Install mudflap*
Read through the entire instruction before starting installation. Ensure that all tools specified in the instruction are available before starting installation. If there are any problems with the instruction or accessories, contact Polestar Customer Support.
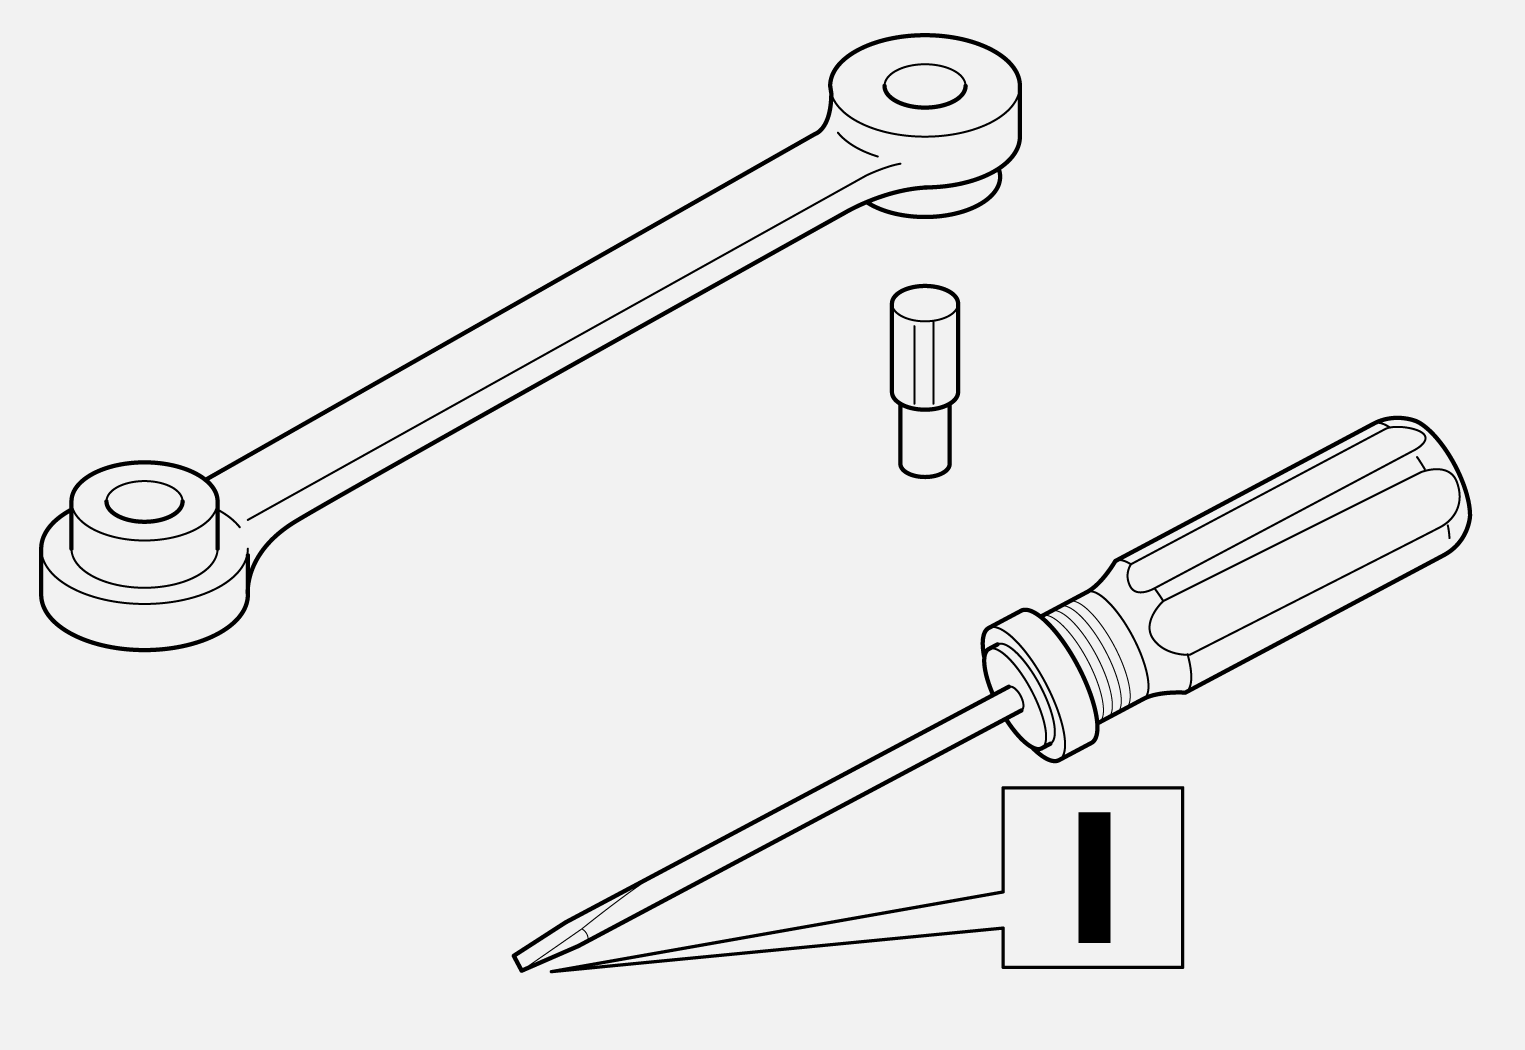
Equipment
Install front mudflap
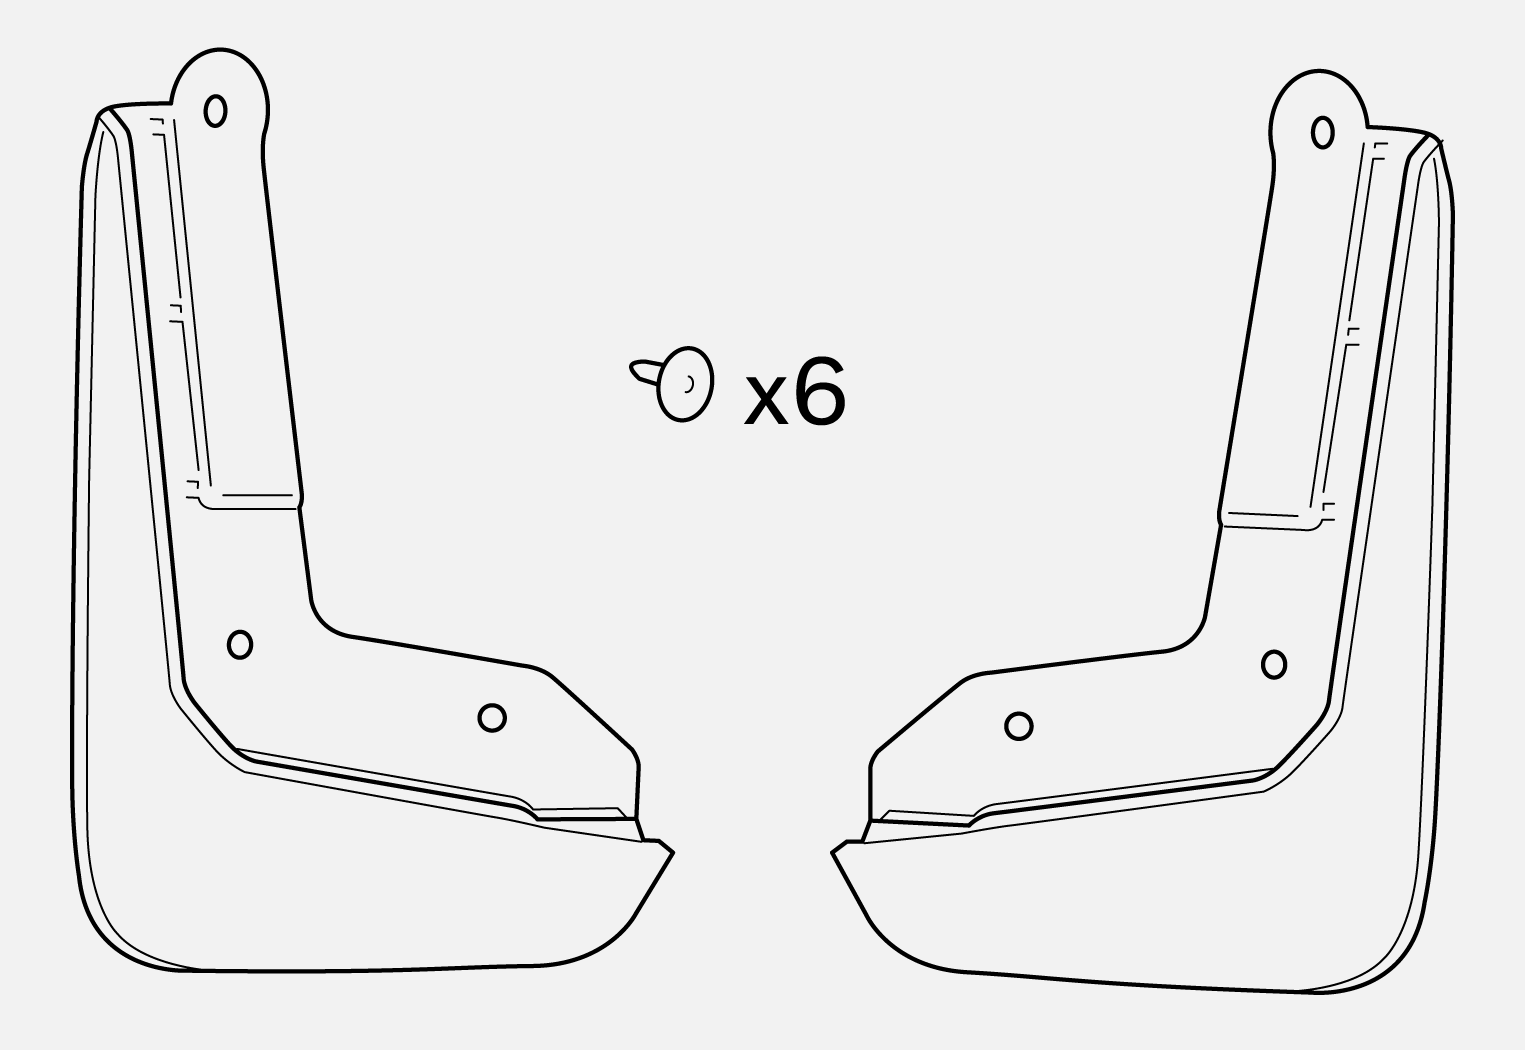
Use the installation instruction below for accessory kit 32341467.
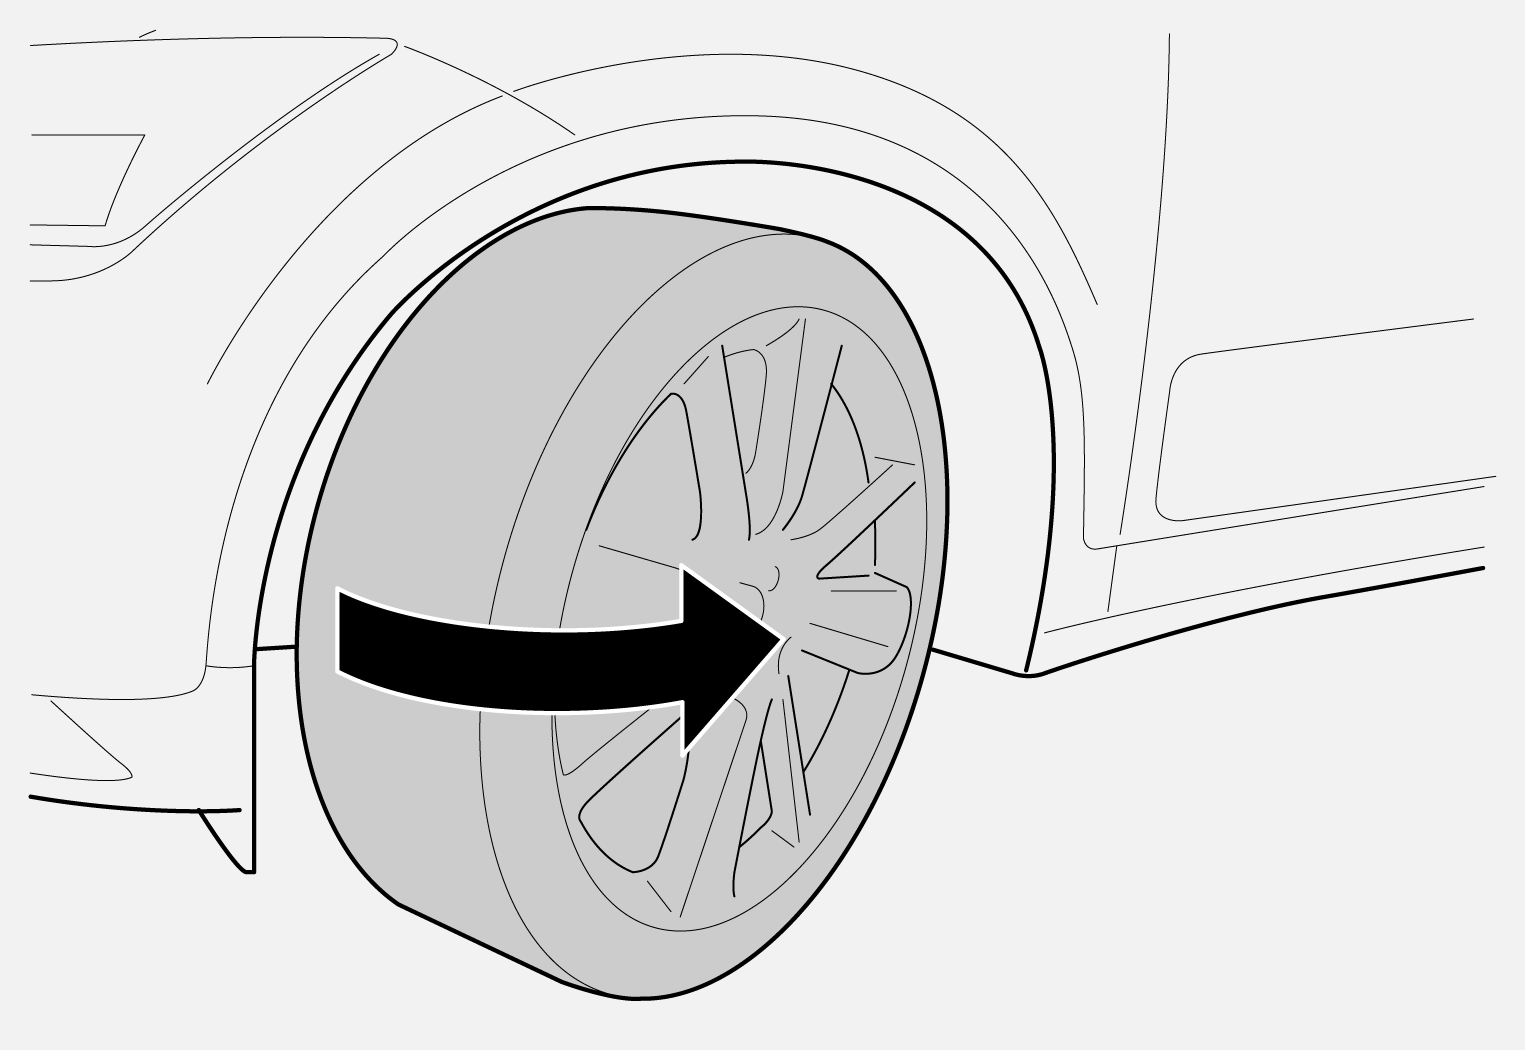
Turn wheel out.
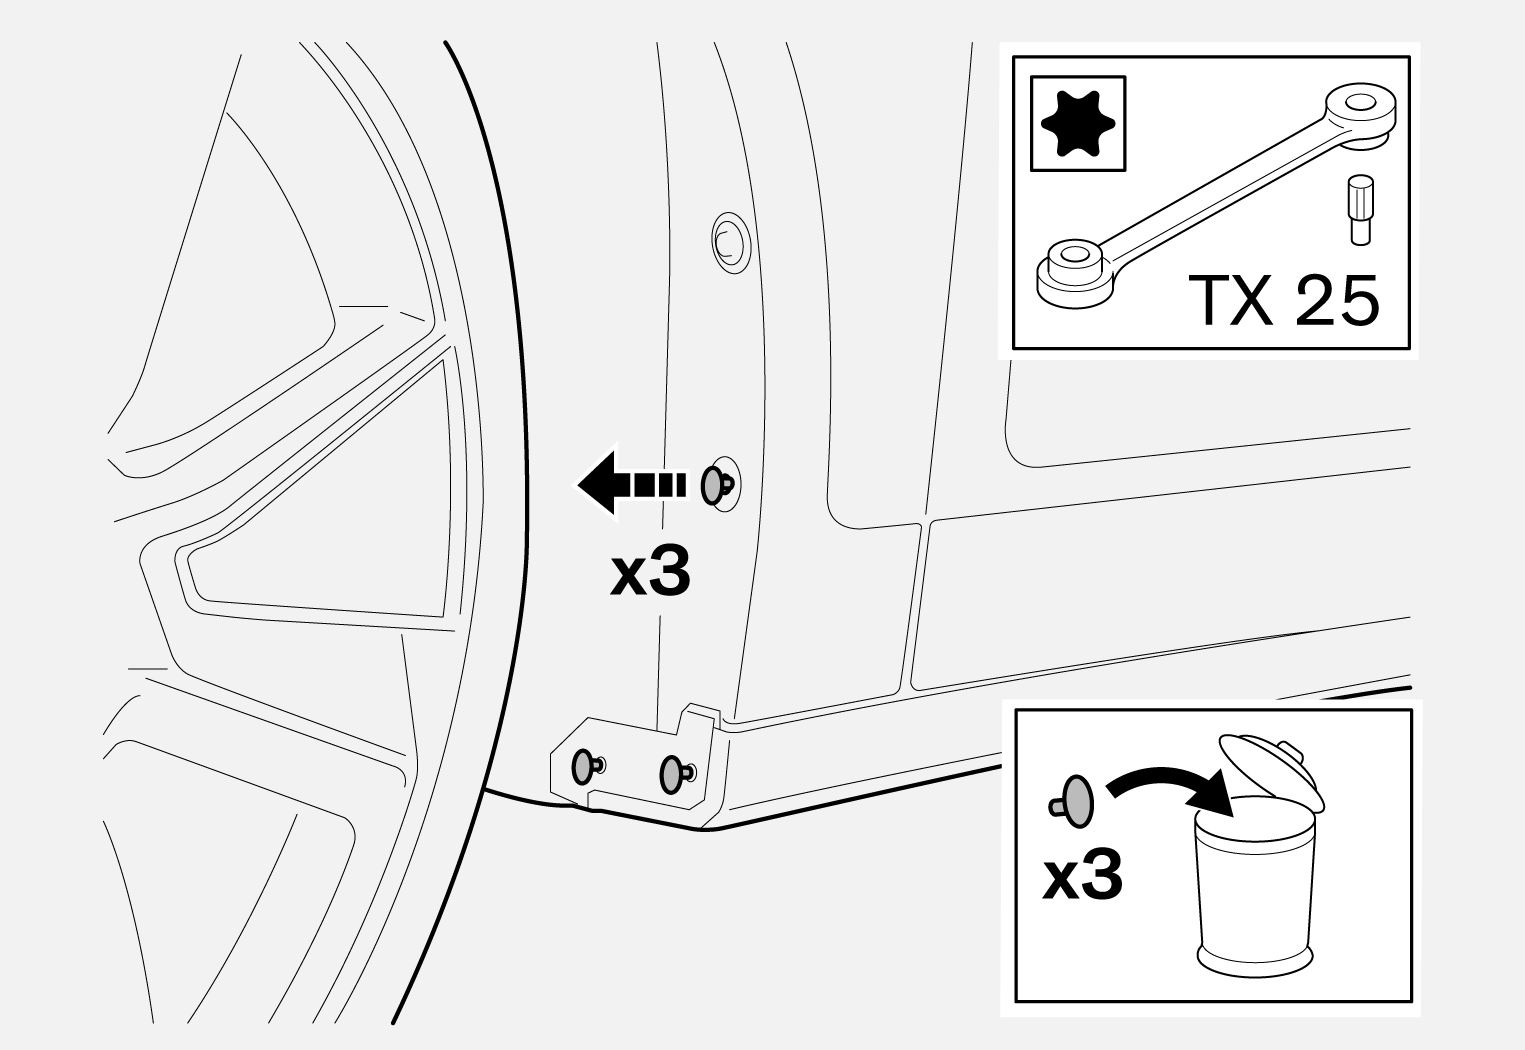
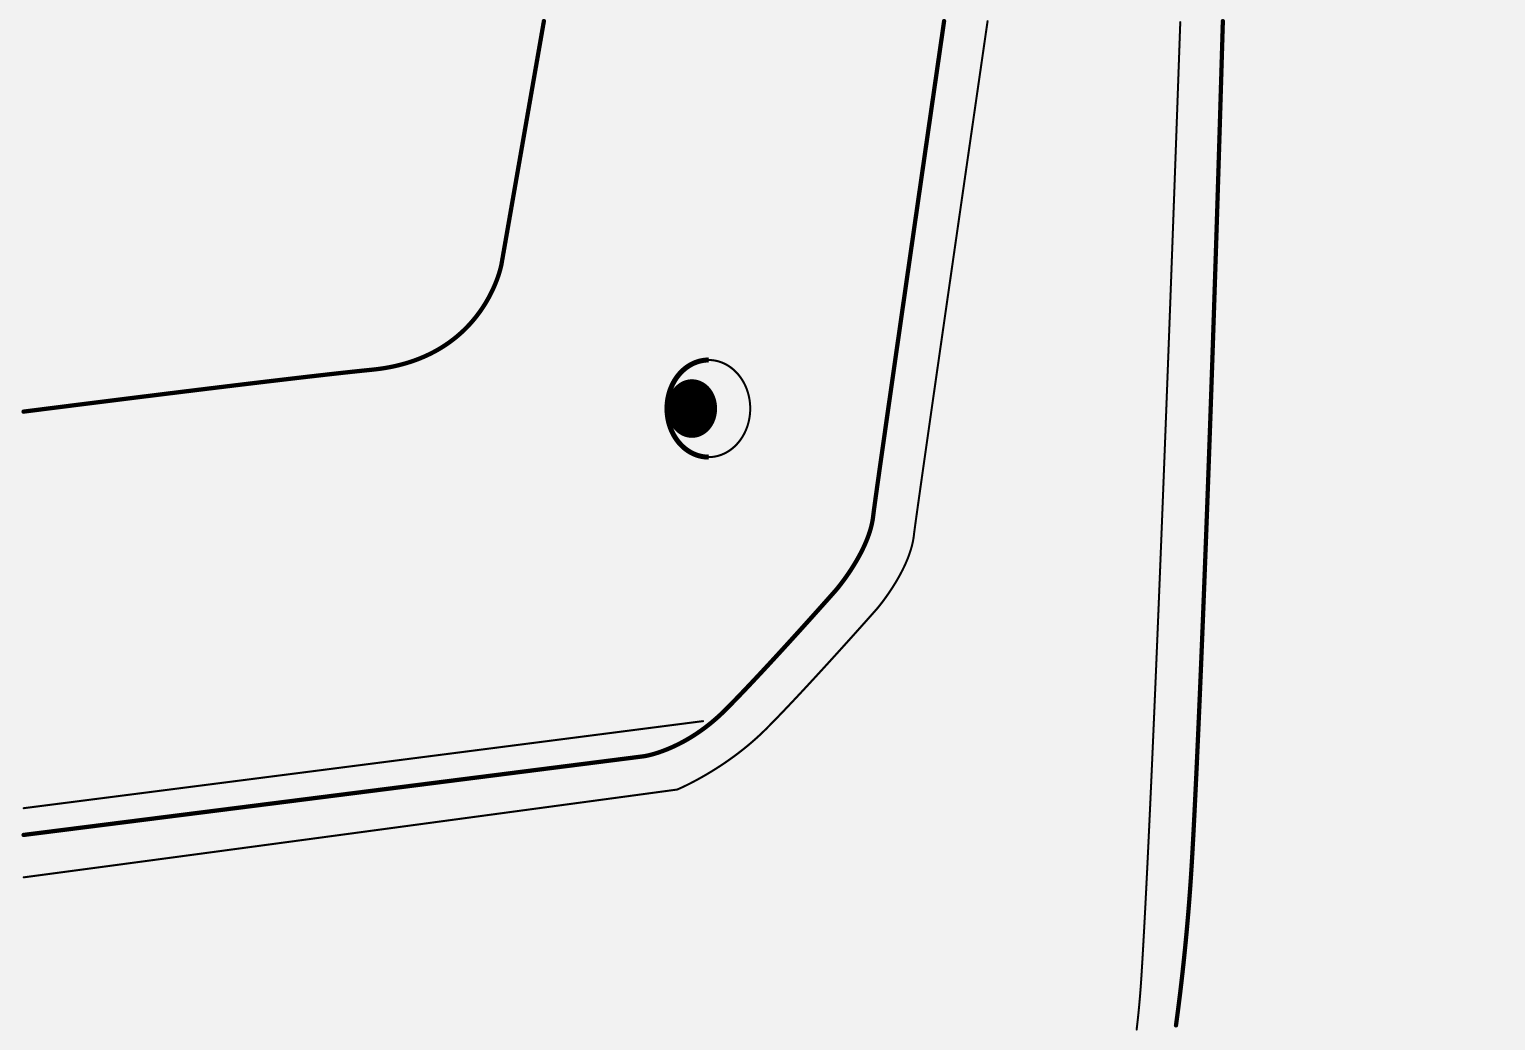
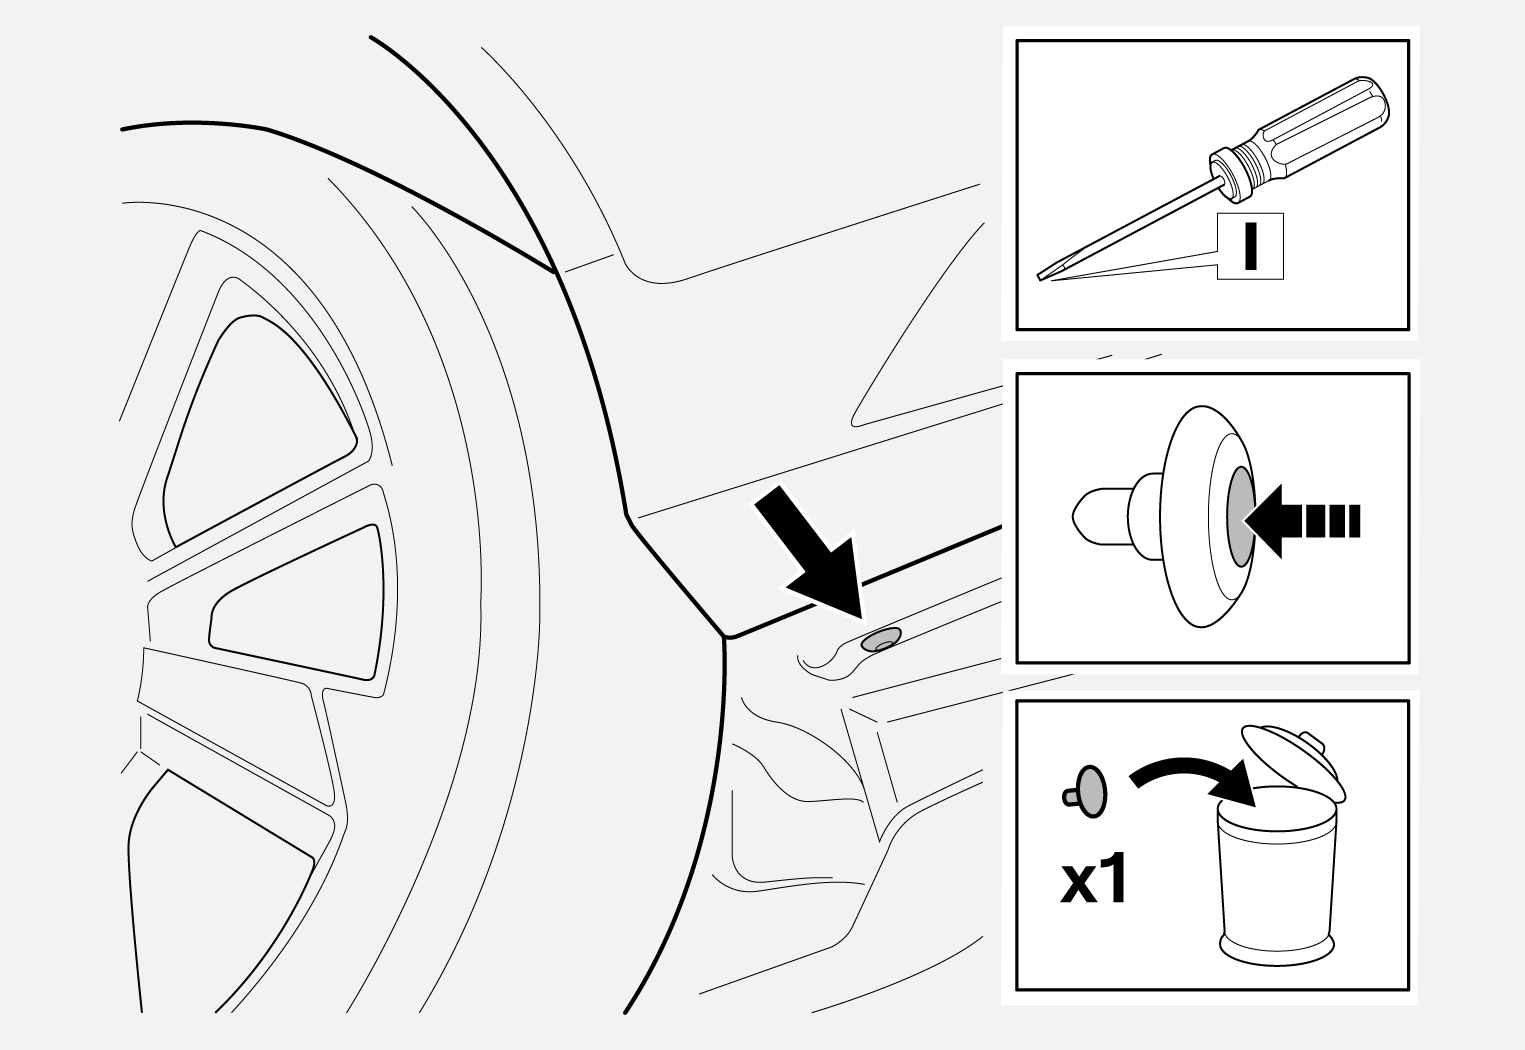
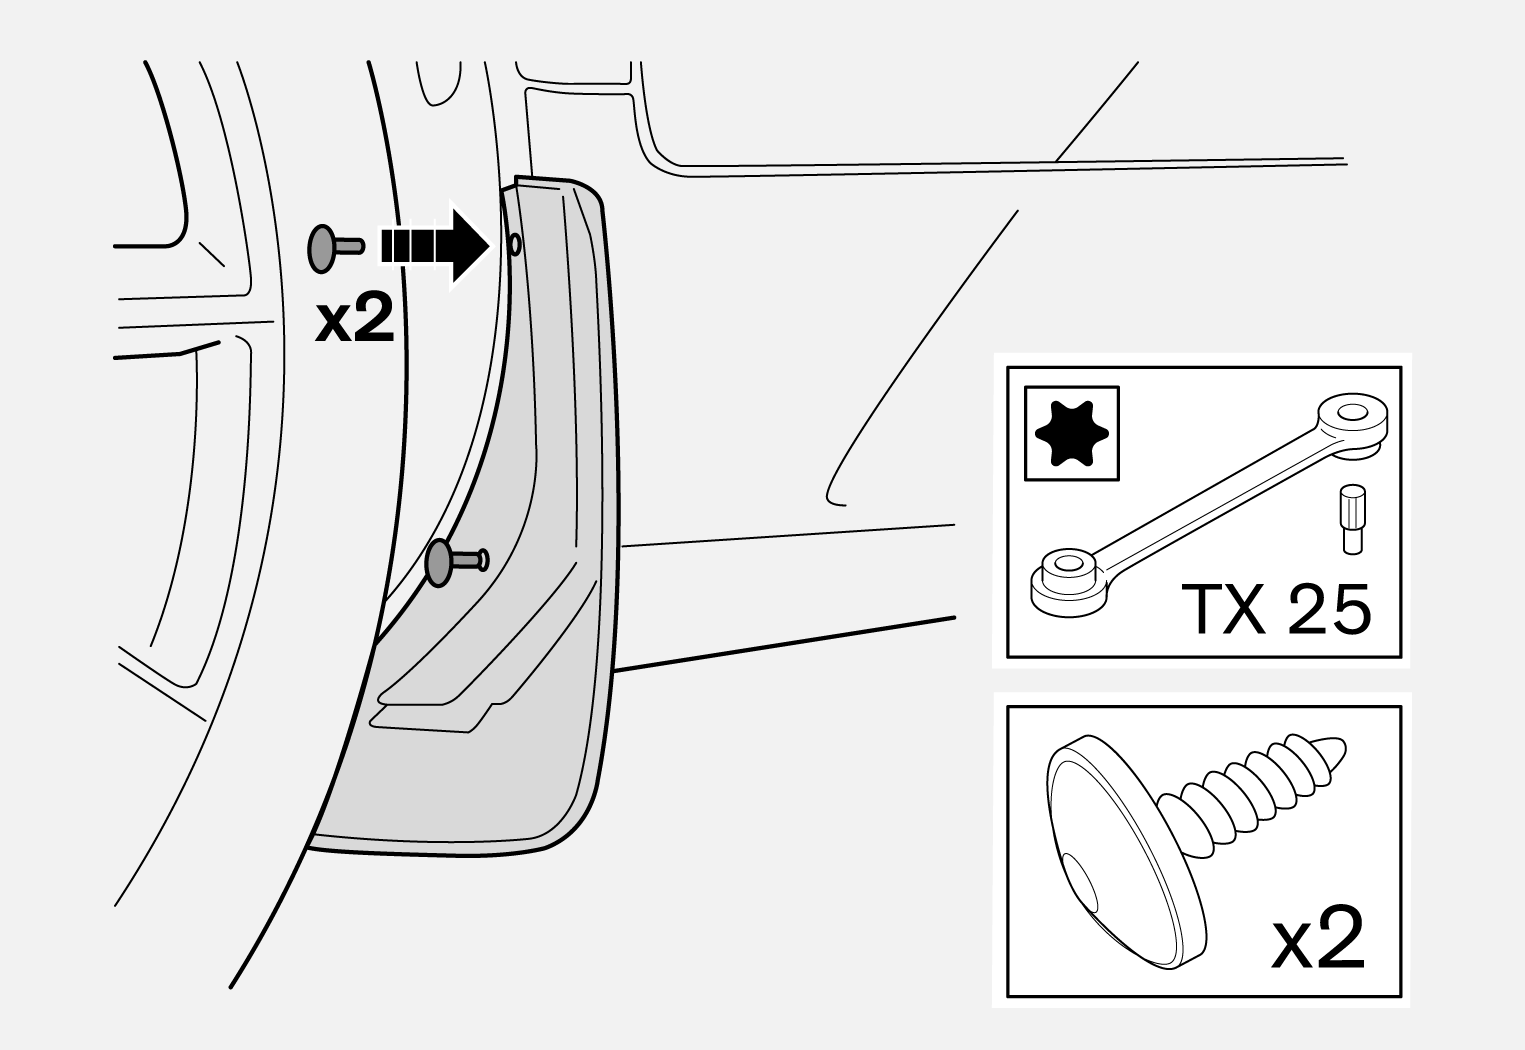
Remove screws. Parts should not be reused.
Clean the surface around the screw holes.
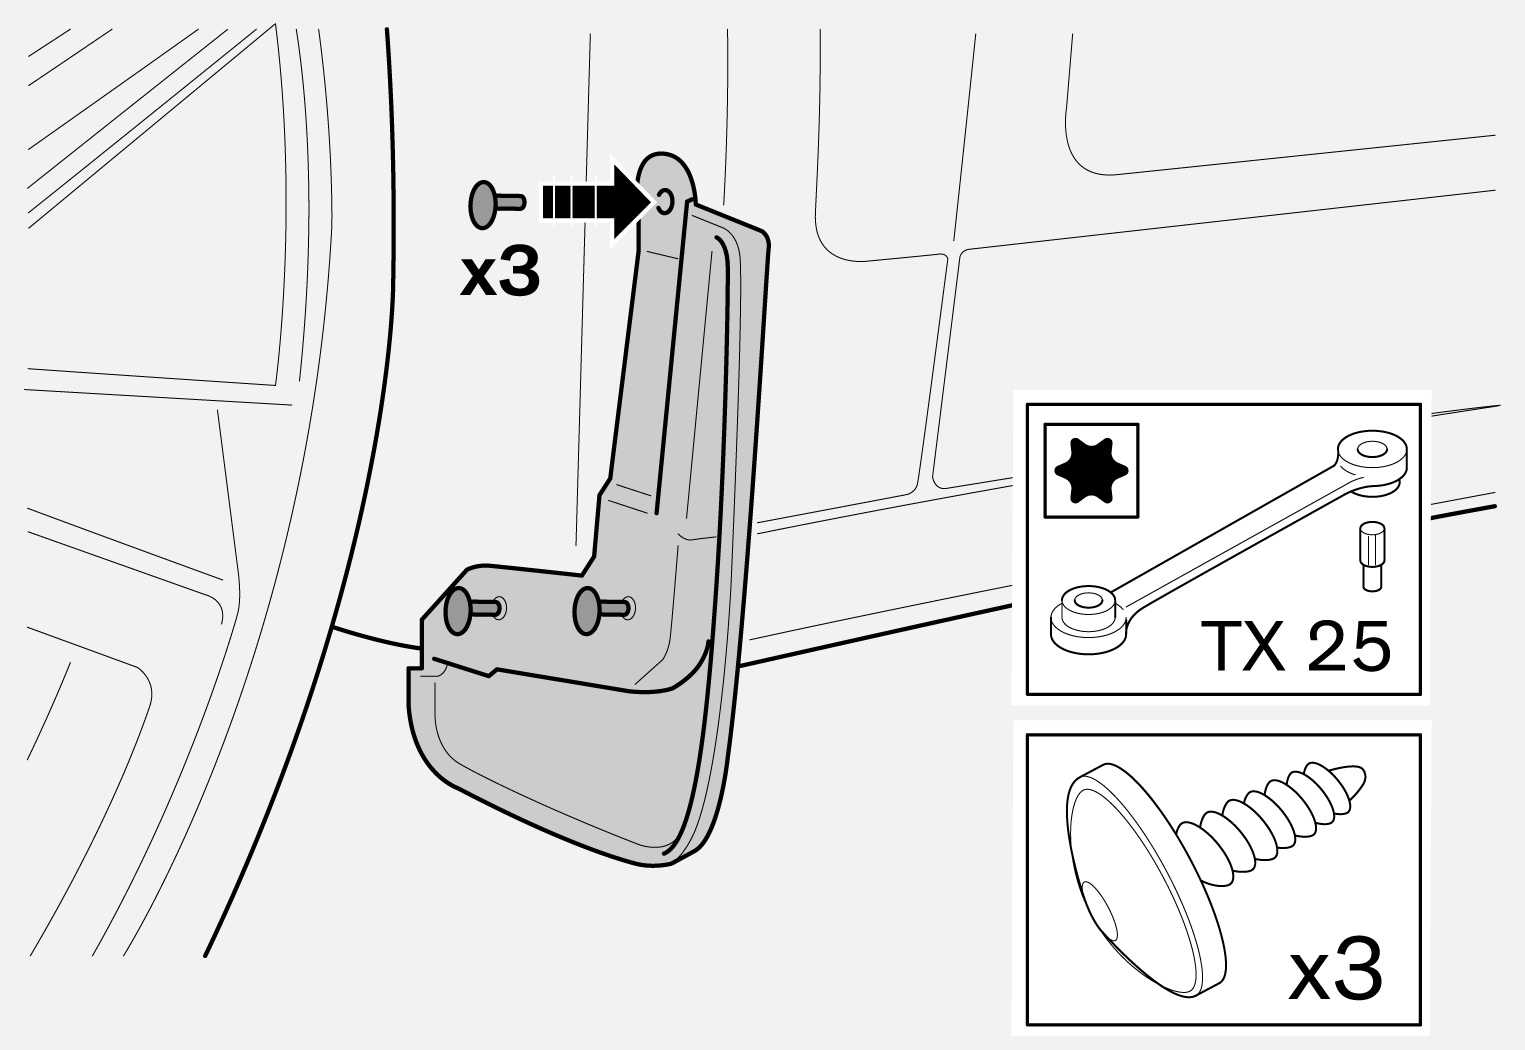
Fit mudflap with the screws supplied.
Note
It is not certain that the screw holes are fully centred compared with the holes in the mudflap. Firmly press the mudflap in and screw in the screws.
Repeat all method steps for the other side.
Install rear mudflap
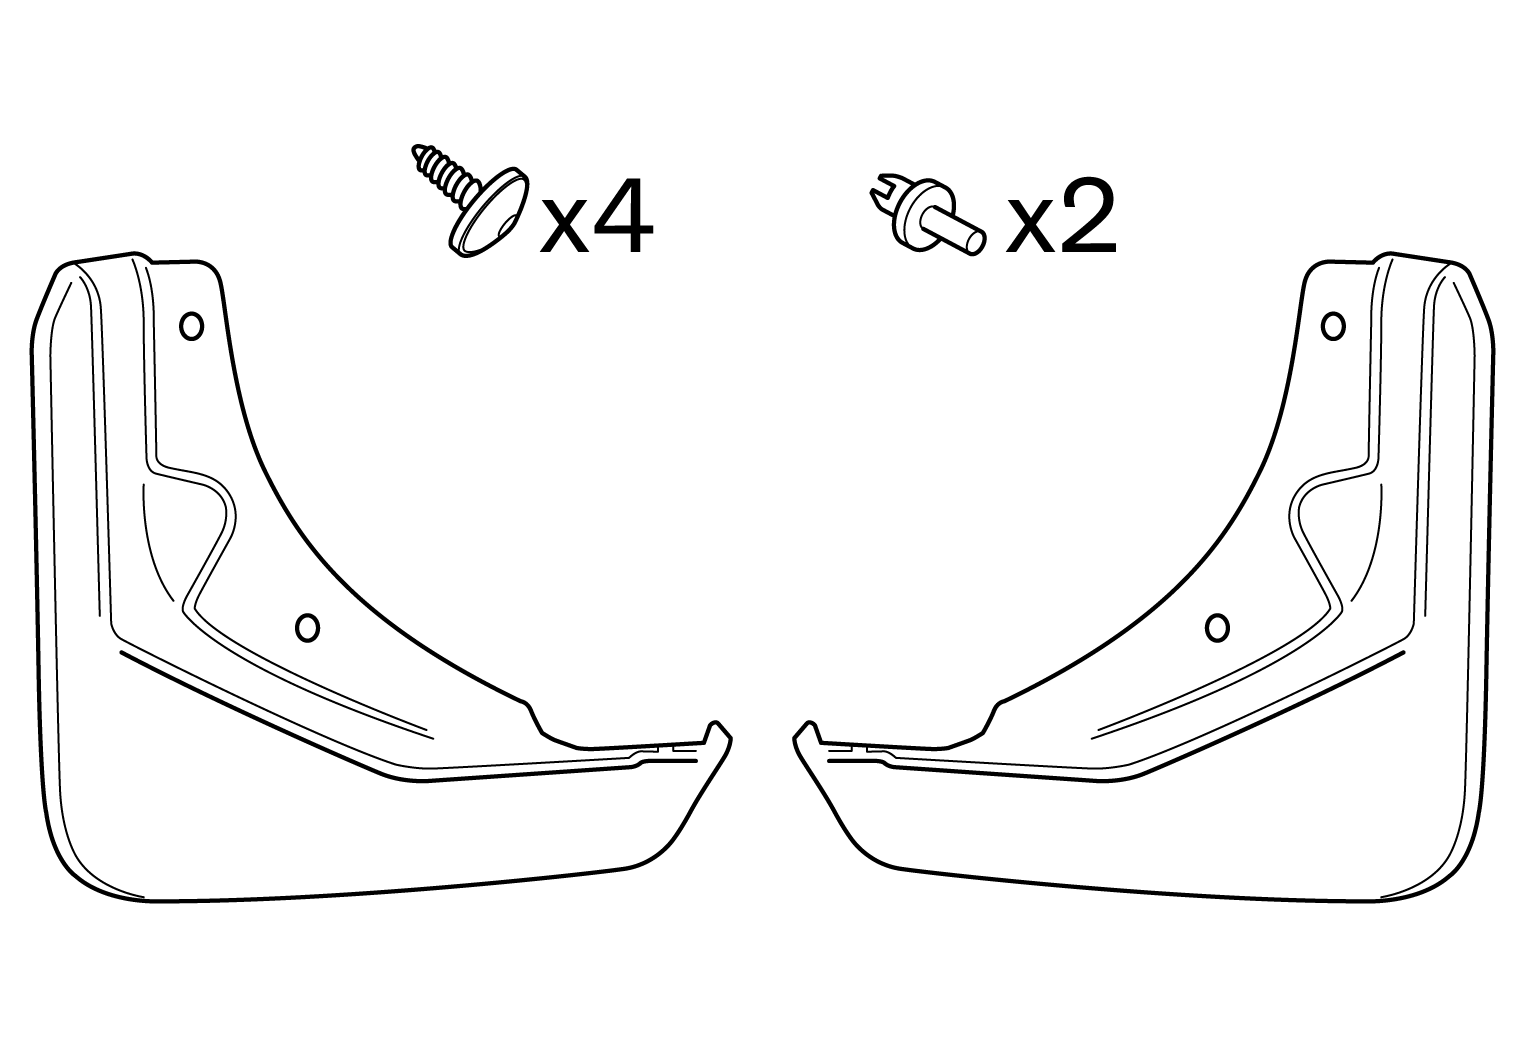
Use the installation instruction below for accessory kit 32341471.
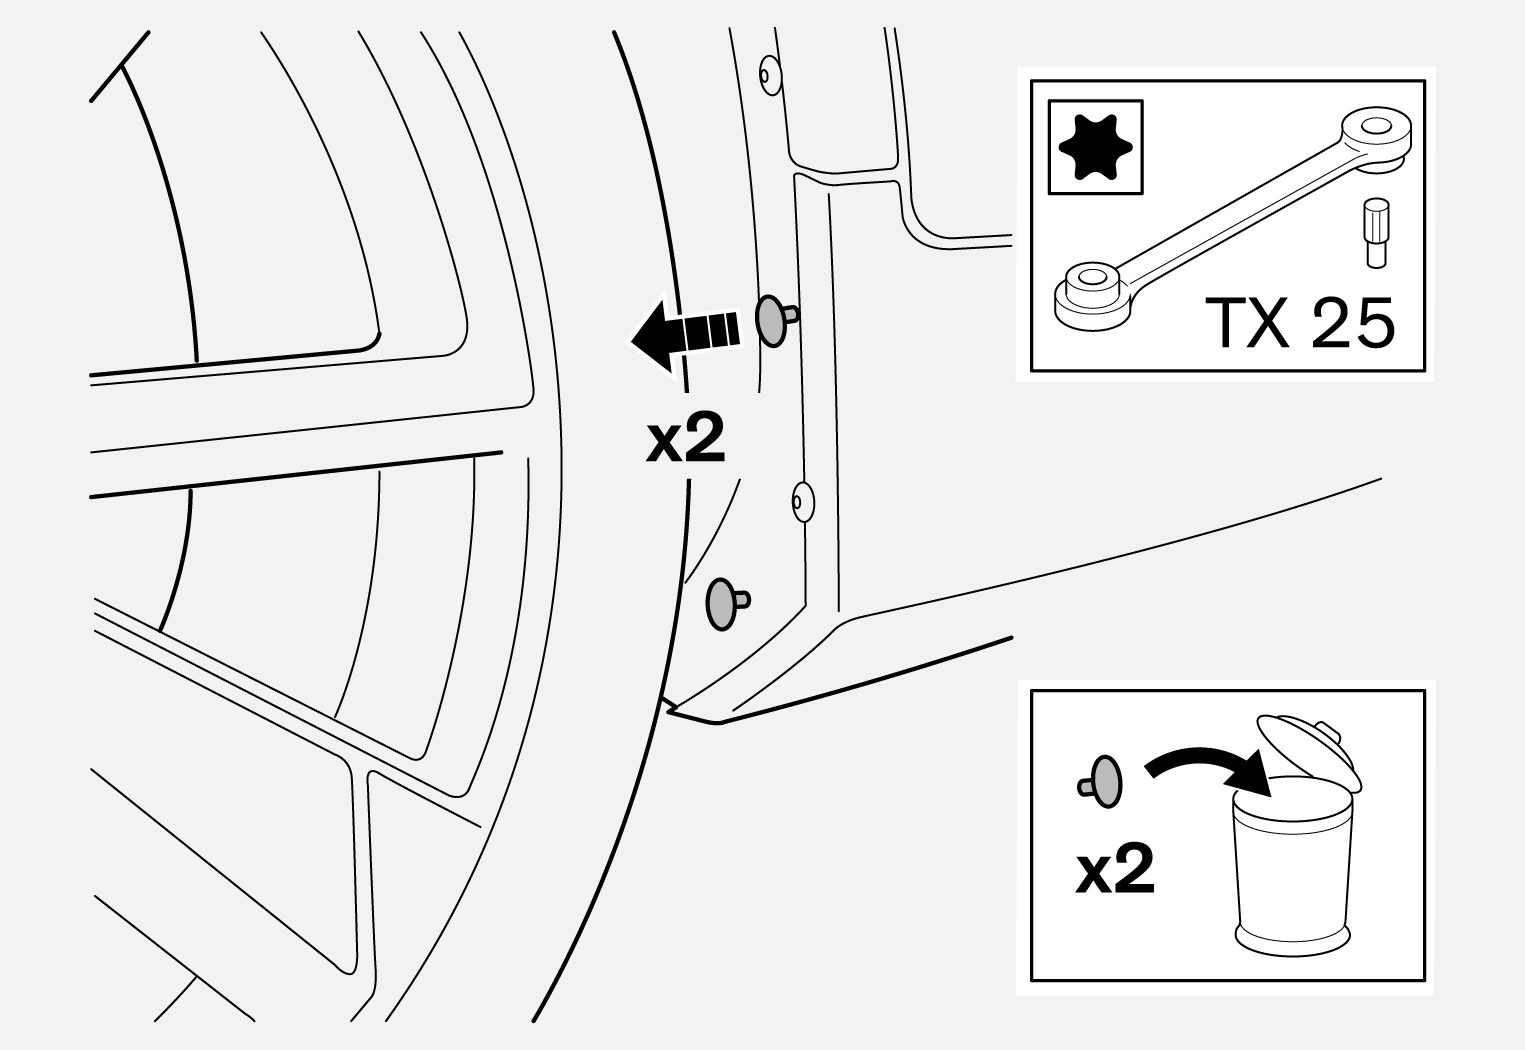
Remove screws. Parts should not be reused.
Remove clips. Parts should not be reused.
Clean the surface around the screw holes.
Fit mudflap with the screws supplied.
Note
It is not certain that the screw holes are fully centred compared with the holes in the mudflap. Firmly press the mudflap in and screw in the screws.
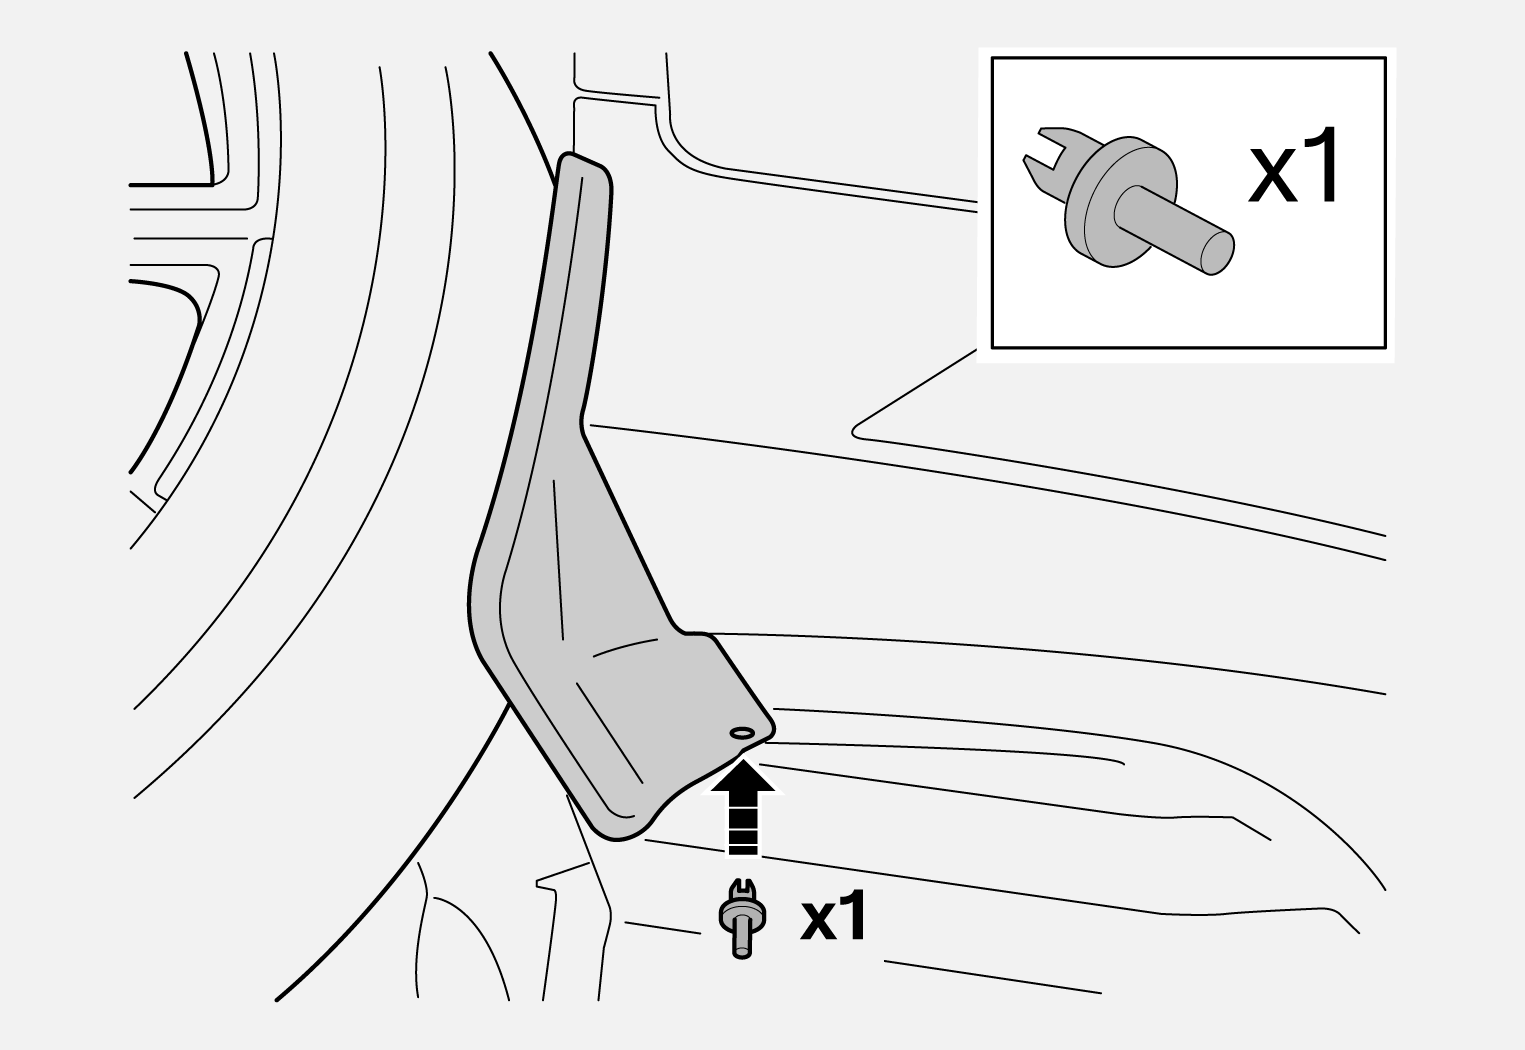
Install using the clips supplied.
Repeat all method steps for the other side.