Replacing the key's battery
Note

- the information symbol illuminates and the message Vehicle key bat. low is displayed in the instrument panel
- the locks do not react after several attempts to lock or unlock the vehicle using the key within approx. 20 meters (65 feet) from the vehicle.
Note
Opening the key and replacing the battery
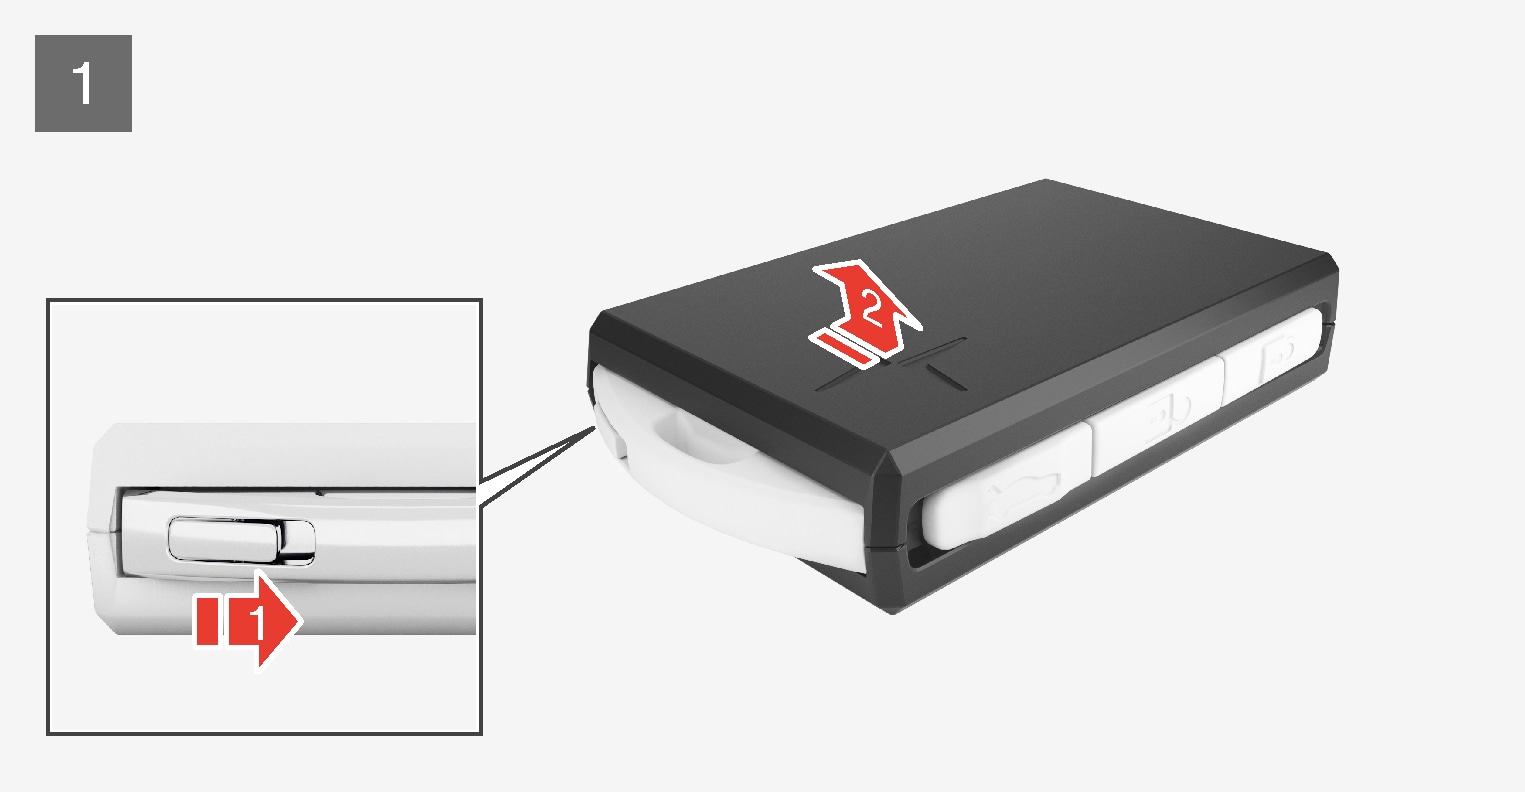

 Hold the key with the front side (with the Polestar logo) facing up and move the button on the key ring section to the right. Slide the front cover slightly upward.
 The cover will loosen and can be removed from the key.
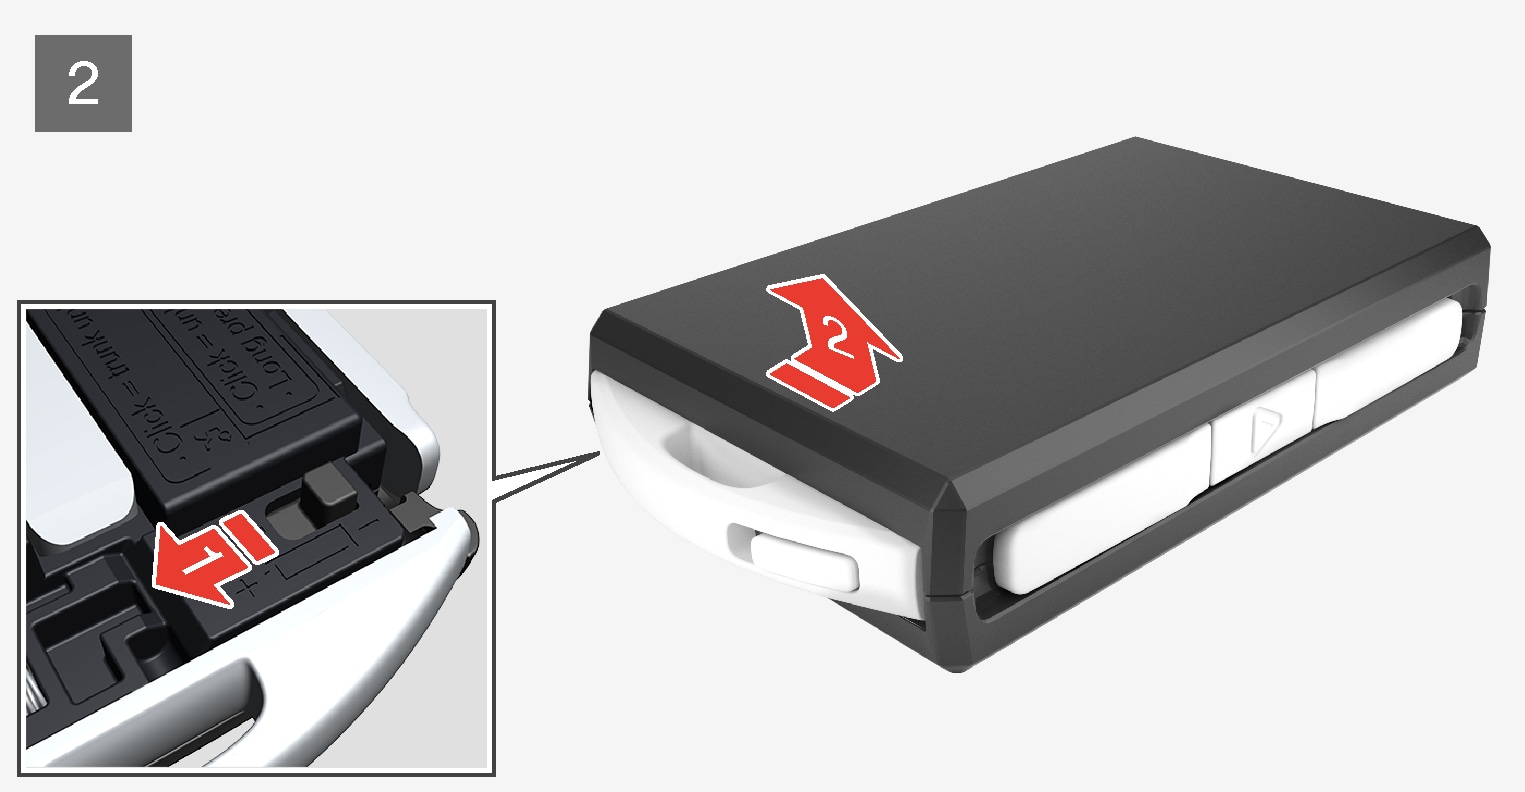

 Turn the key over, move the button to the side and slide the rear cover slightly upward.
 The cover will loosen and can be removed from the key.
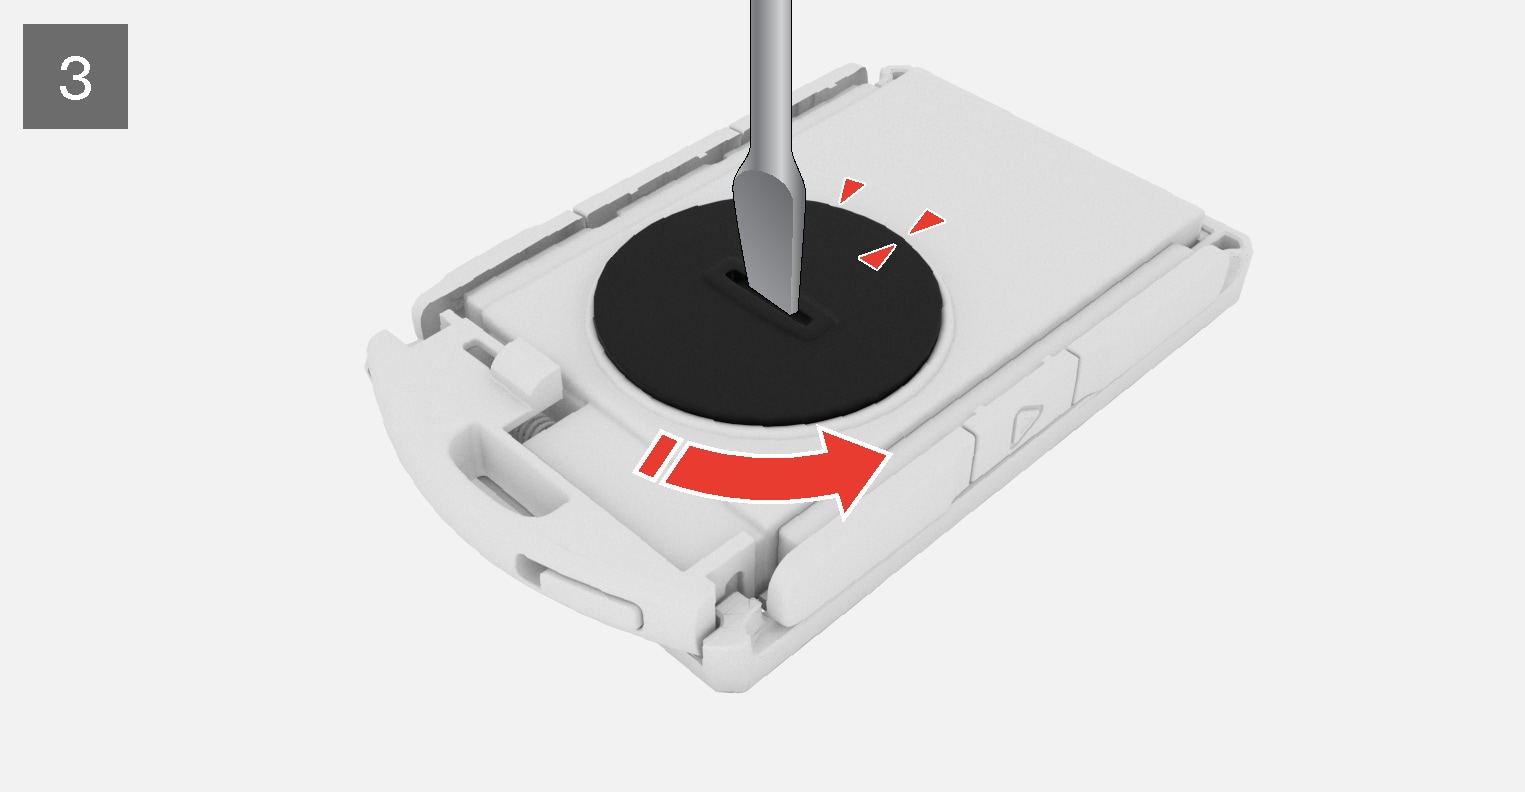

Use a screwdriver or similar object to turn the battery cover counterclockwise so the markers point to OPEN.
Remove the cover carefully by pressing e.g. a fingernail into the indentation.
Pry the cover up.
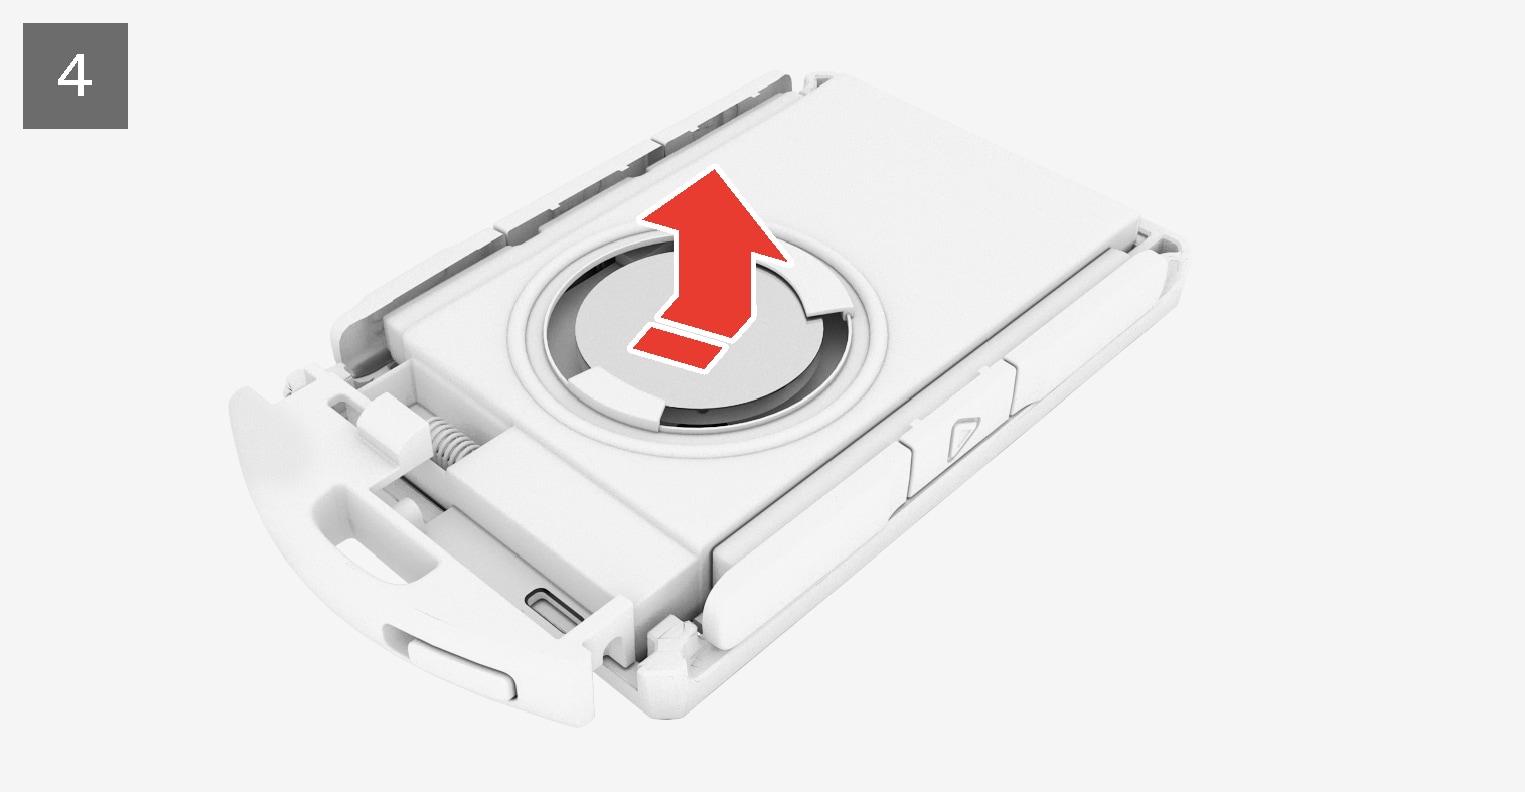

The battery's positive side (+) faces upward. Carefully pry out the battery as shown in the illustration.
Important
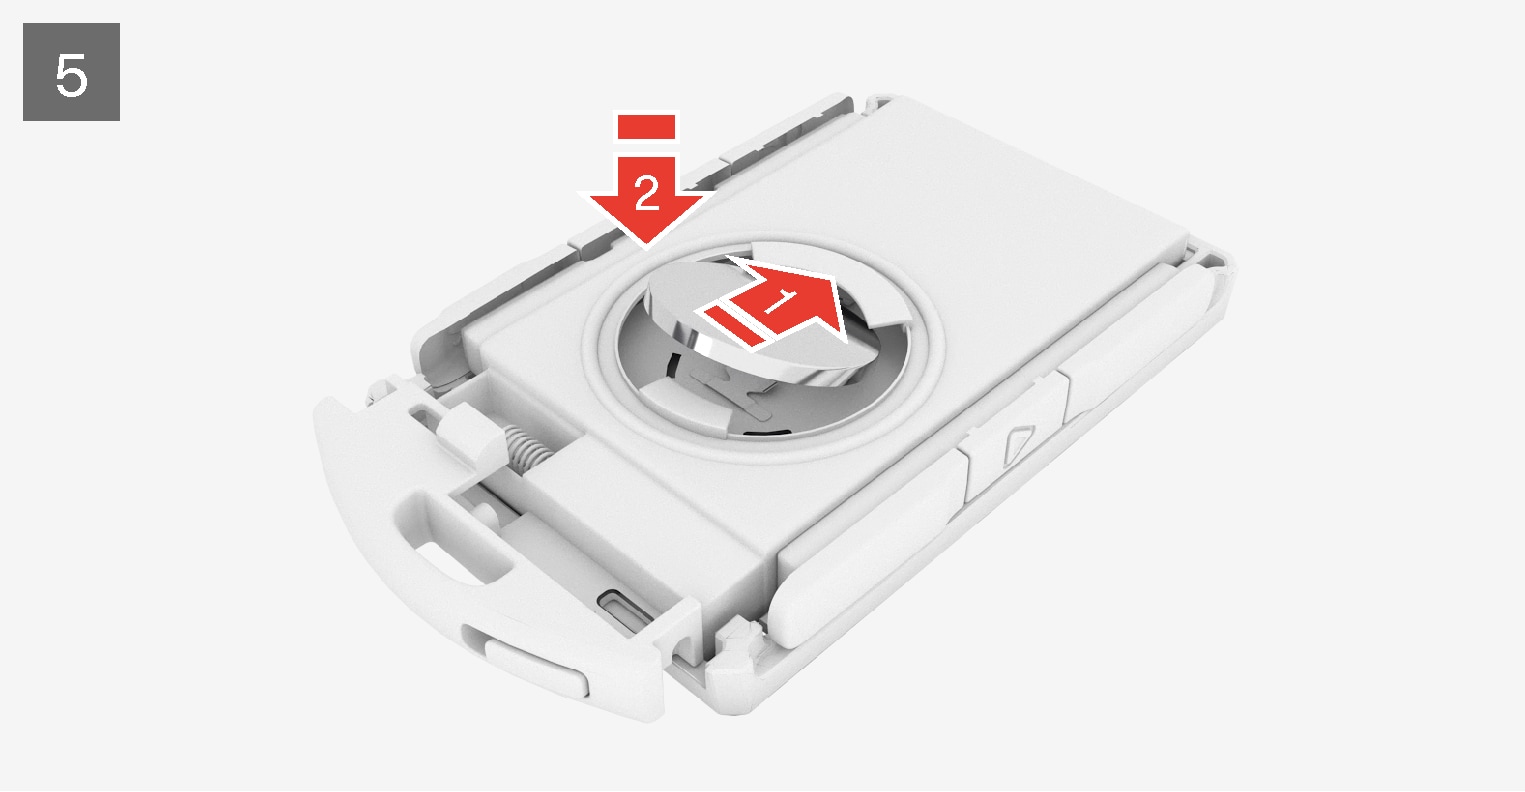

Insert a new battery with the positive side (+) facing upward. Do not touch the contact surfaces of the key battery.
 Place the edge of the battery downward into the holder. Slide the battery forward until it locks into place under the two plastic catches.
 Press the battery downward until it locks into place under the upper black plastic catch.
Note
Note
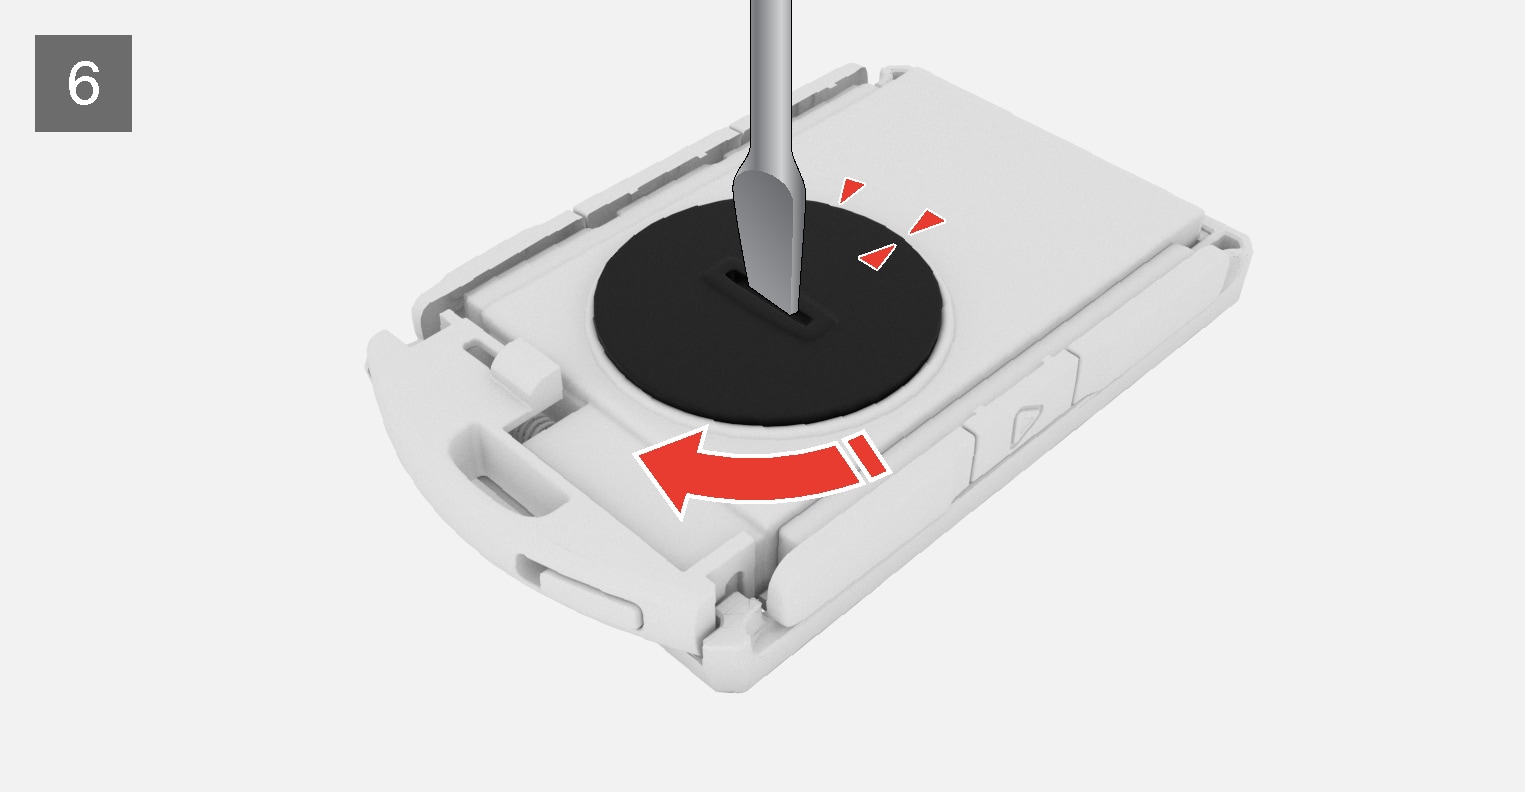

Replace the battery cover and turn it clockwise until it points to CLOSE.
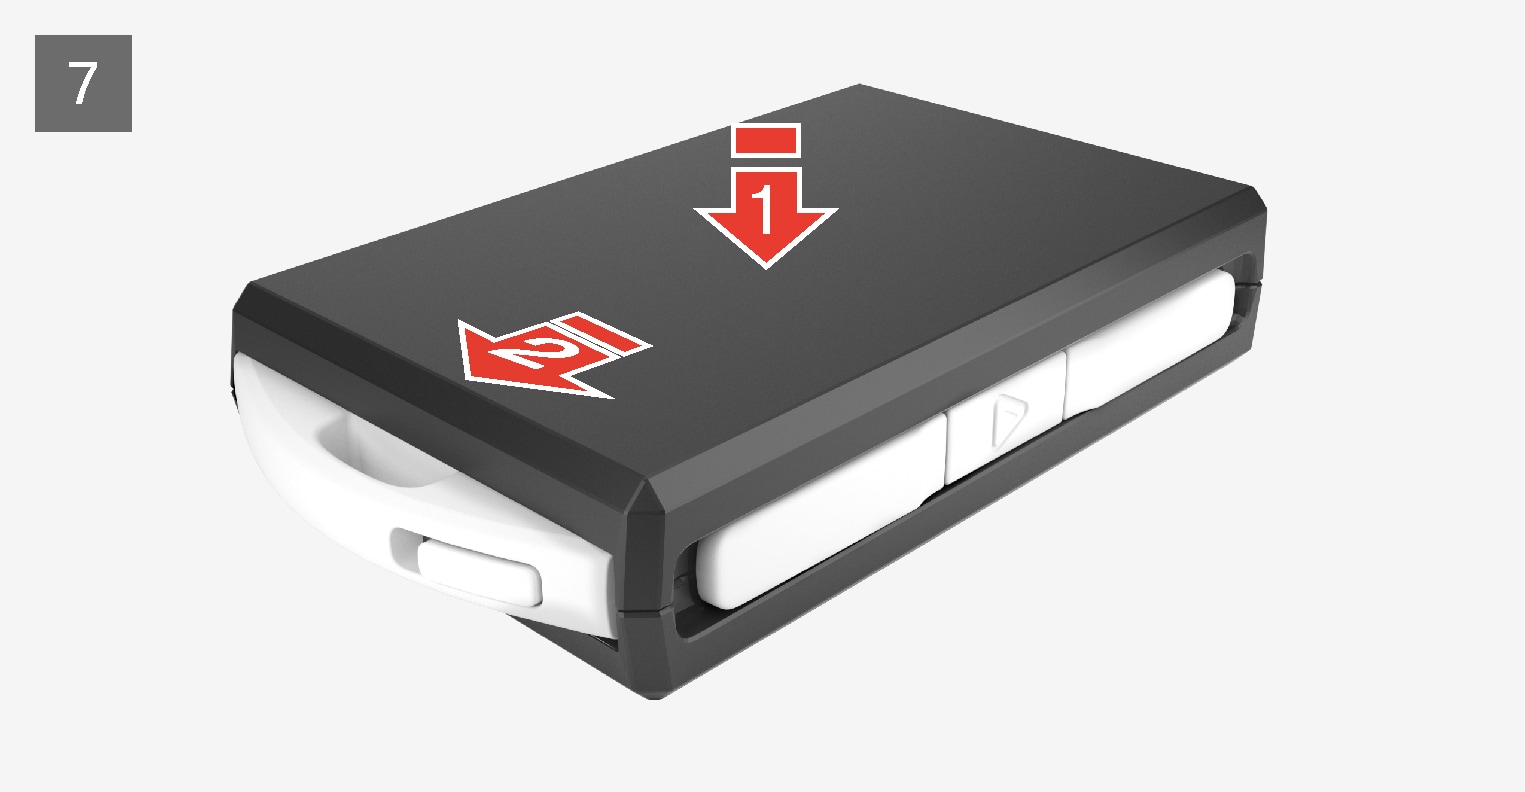

 Put the rear cover back into position and press it down until it clicks into place.
 Slide the cover back.
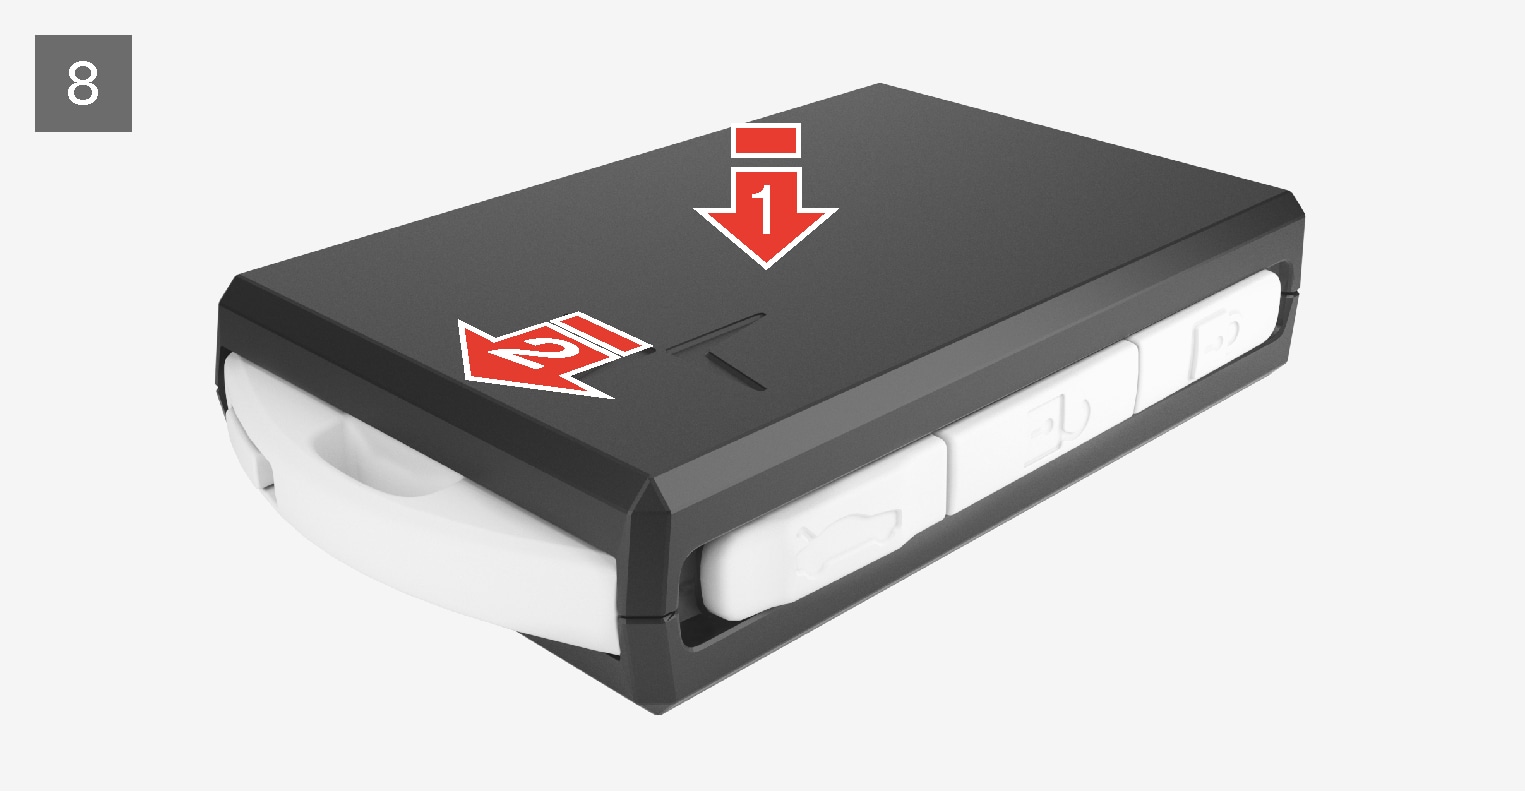

 Turn the key over and press the front cover down until it clicks into place.
 Slide the cover back.
Important
Warning
California Proposition 65
Operating, servicing and maintaining a passenger vehicle can expose you to chemicals including engine exhaust, carbon monoxide, phthalates, and lead, which are known to the State of California to cause cancer and birth defects or other reproductive harm. To minimize exposure, avoid breathing exhaust, do not idle the engine except as necessary, service your vehicle in a well ventilated area and wear gloves or wash your hands frequently when servicing your vehicle. For more information go to www.P65Warnings.ca.gov/passenger-vehicle.


